

Table of Contents [Show]
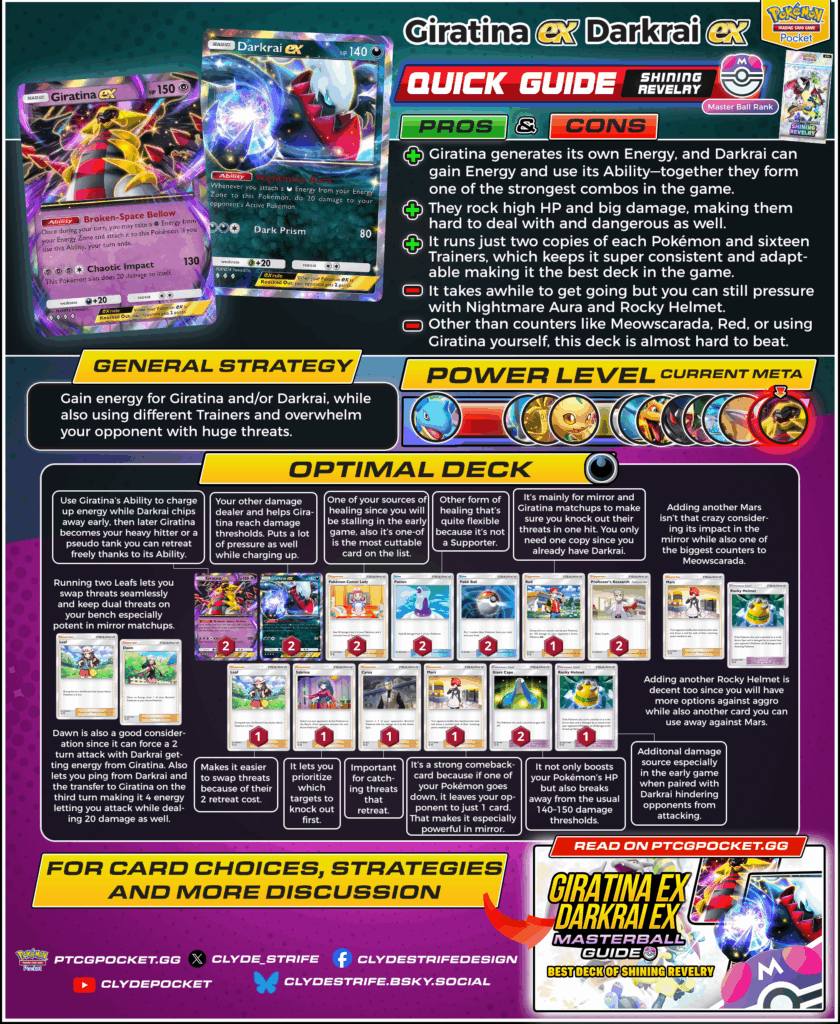
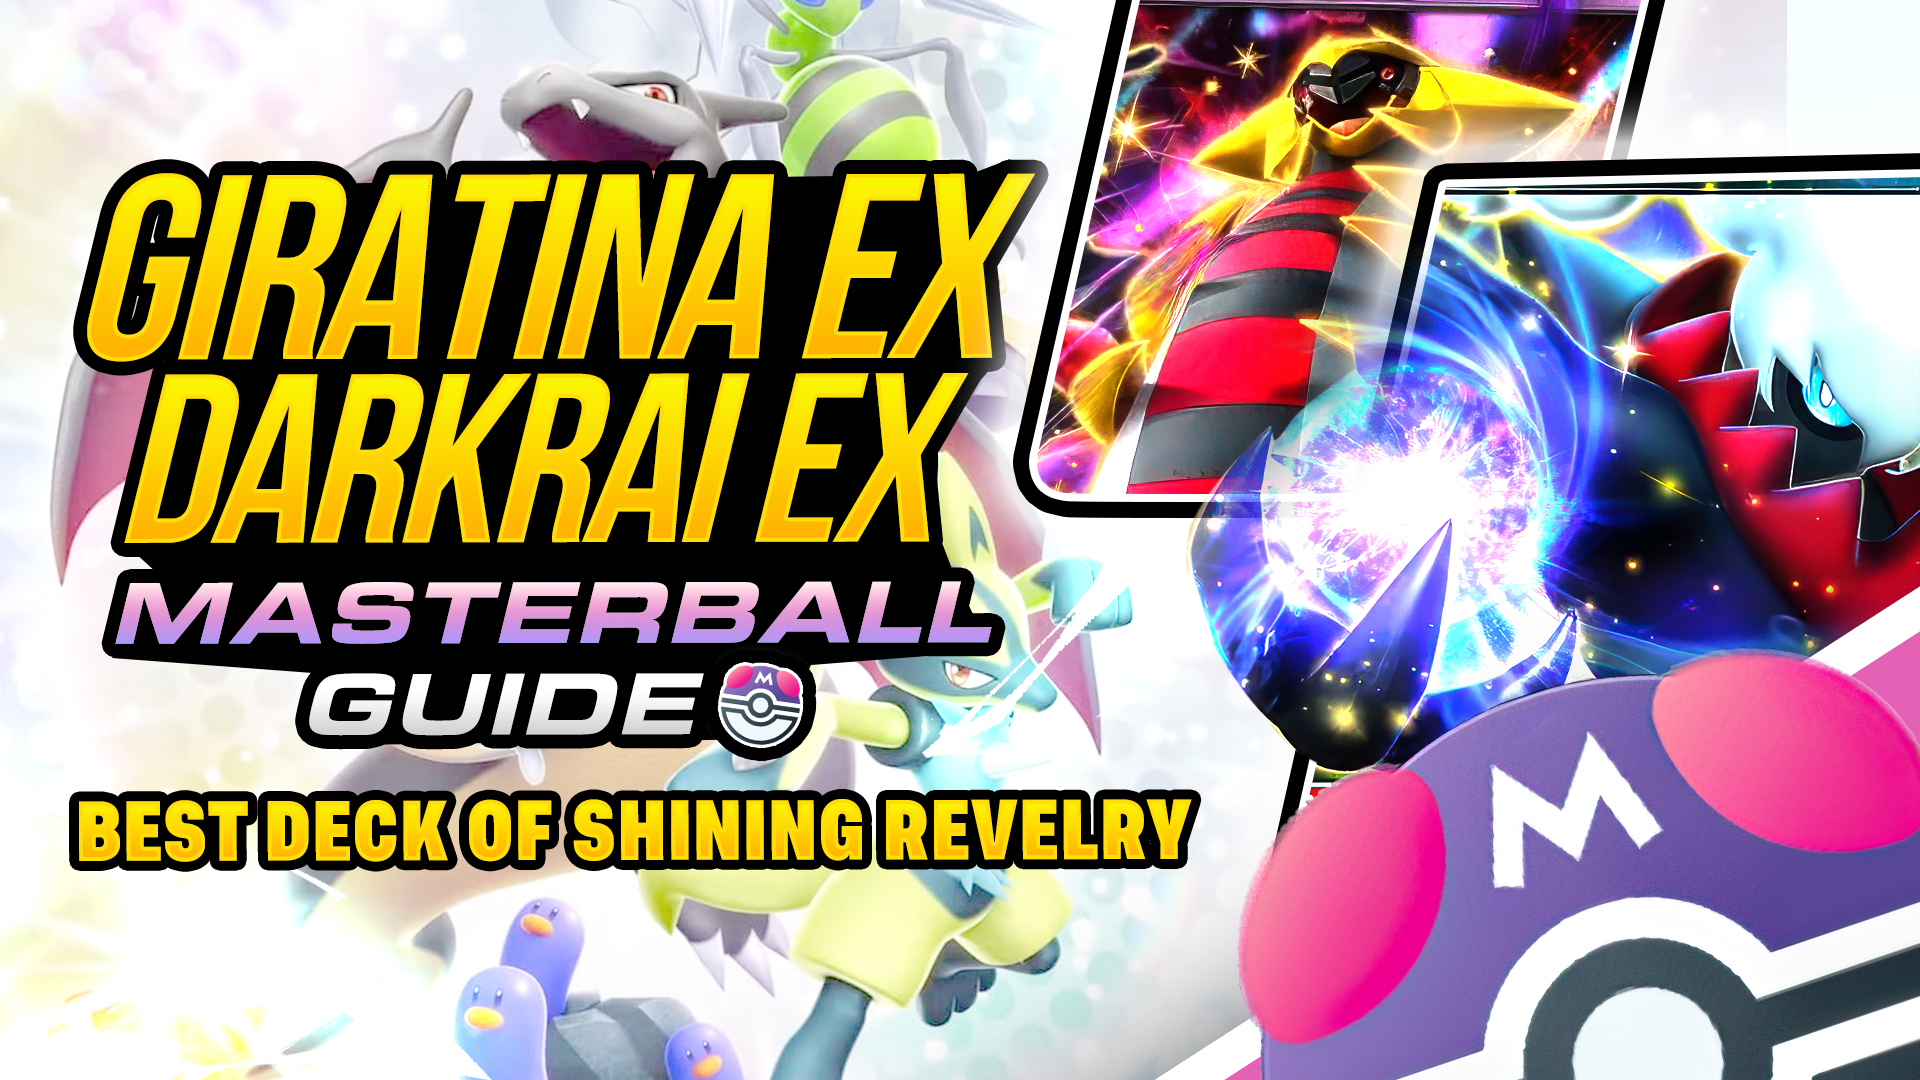
If you’ve been grinding Ranked lately, you’ve almost definitely run into this deck—maybe even taken a few beatings—because A2b-035 & A2-110 is hands-down the strongest build in the format. If you’re aiming for a consistent climb to Master Ball, this is the deck to take you there. It’s strong right out of the box, but there’s real depth in how you play it. Decisions like where to place Energy, when to swing with A2b-035, or when to hold for its Ability all create different paths mid-game. And from what I’ve seen, a lot of players aren’t piloting it optimally—so I’m here to help you fix that.
Let's check the best deck!
Strengths & Weaknesses
| Pros | Cons |
| + A2b-035 generates its own Energy, and A2-110 can gain Energy and apply pressure through its Ability—together, they form one of the strongest combos in the game. | - Takes a while to get going, but you can still apply pressure early with Nightmare Aura and A2-148. |
| + They rock high HP and big damage, making them hard to deal with and dangerous as well. | - Other than counters like A2b-007, A2b-071, or a well-timed A2b-035 mirror, this deck is almost hard to beat. |
| + It runs just two copies of each Pokémon and sixteen Trainers, which keeps it super consistent and adaptable making it the best deck in the game. |
How to Play Giratina Darkrai
The general strategy is to charge up A2b-035 using its Ability while manually attaching to A2-110, setting both up as win conditions later in the game. Along the way, you’ll use your Trainer engine to maintain pressure, heal, and disrupt your opponent.
There are a lot of small optimizations that go a long way—sometimes just one misplaced Energy can cost you the match. Knowing when to hold back Giratina’s attack or when to fully commit Darkrai makes the difference between winning and falling short.
This build runs only Darkness Energy, focusing entirely on A2-110’s passive damage output. A2b-035 doesn’t need external acceleration—its Ability already does all the heavy lifting, letting you reserve attachments for Darkrai so it can stay active and chip every turn.
Turn 1
- Find A2b-035 and A2-110 as early as possible—you want to attach Energy to both, especially Giratina.
- If you have PROMO-007 and PROMO-005, use Research first for a better chance to draw into another Basic. Using Poké Ball first might just find a duplicate.
- If you have both Darkrai and Giratina:
- Start with A2b-035. It damages itself when attacking, so it’s more sacrificial and harder to keep alive.
- It also charges itself with its Ability so you have free retreat in case you want it.
- If you’re going first, only play A2b-035 to avoid getting hit by A1-225.
- If you have a large hand after using PROMO-007 and already drew both Basics, consider benching both to play around A2-155, especially if your opponent saw you use PROMO-005.
Midgame
- Once you have 3 Energy on A2-110 or 3 Psychic on A2b-035, and you’re ready to attach the fourth, this is a key decision point.
- Choose your attacker carefully: If you think A2-110 can close out the game, protect it—it doesn’t self-damage and can keep applying pressure.
- If you’ll need A2b-035's 130 damage later, bring out Darkrai now and save Giratina for the finishing swing.
- One of the deck’s biggest moments is deciding whether to attack now or hold off to reach 4 Energy on A2b-035. Sometimes this is your last chance to use its Ability, so don’t miss it.
- Use A2b-070, PROMO-001, and A2-147 to prevent knockouts and keep your attackers on board longer.
- Only use Tools when they give immediate value:
- A2-147 is best when you expect a knockout next turn.
- A2-148 is great against low-HP attackers—drop it early to punish aggression.
- Use Helmet to help hit damage thresholds above 150 HP that A2b-035 and A2-110 alone can’t reach.
- Since this list only runs a single A1a-068, knowing when to use it matters. Consider attaching extra Energy in advance if you plan to retreat later or need to play around A1-225 or A2-150.
Endgame
- By now, you should have two attackers ready—either A2b-035 and A2-110, or double A2-110, since charging Giratina this late is usually only viable through its Ability.
- This is the deck’s strongest point—you’re now threatening with two high-HP, high-damage attackers that are tough to deal with, assuming your early-game Energy setup went smoothly.
- Since the deck runs multiple Tools, the endgame becomes all about adapting based on the situation:
- Use A1-225 or A2-150 to bounce or isolate threats.
- Aim for one-shots with A2b-071, especially when paired with A2-148 to hit threshold damage.
- A2-155 is extremely potent in the late game:
- Since both your Pokémon are EX, each knockout gives up 2 points, which means a well-timed Mars activation can leave your opponent with only one card.
- It’s a powerful comeback tool or momentum breaker—use it when they’re about to stabilize to shut down key plays.
Mirror Match Strategy
- Since this is the best deck in the game, expect a lot of mirrors—especially once you reach Ultra Ball and up.
- Most players in this range don’t fully understand how to navigate the mirror, so take advantage of that and play to out-position them.
- The goal in mirrors is to have two attackers—A2b-035 and A2-110—fully set up, so that if one goes down, you immediately have a backup ready to respond.
- It’s important that your knockouts happen on succeeding turns—if they retreat, it becomes harder to finish them off, especially if they use A2-155 to block your A2-150 or A1-225 follow-up.
- One-shotting both attackers is hard, so A2-150 becomes a key play if you can isolate a wounded threat. Just be careful—they can still revenge KO you the following turn.
Two main paths in the mirror:
- You knock out first → they KO your attacker → you revenge KO theirs.
- Ideal if you’re going first.
- Keeps you ahead on board presence and tempo.
- They KO your tank first → you KO their attacker, but make sure your own attacker survives their revenge.
- Sets up for a A2-155 play to limit their hand.
- Can be just as strong if timed right.
Ideal scenario:
- Have a tanky Pokémon in the Active, while charging A2b-035 and A2-110 on the bench.
- Use A1a-068 later to bring your attacker forward.
- This requires 3 Basics in play and holding Leaf, so it’s not easy—but if you pull it off, it gives you control of the pace.
If you’re going first, you usually want to attack first to apply pressure and force awkward responses.
Things to watch out for:
- If your opponent plays it well and doesn’t charge their Active, instead charging both A2b-035 and A2-110 in the back, you may be forced to sacrifice one of your attackers.
- This is where A1a-068 becomes critical—use it to send up a decoy and avoid trading into their setup directly.
- Still, attacking first usually gives you the advantage—as long as you know you can KO their next attacker, you stay in control. So a Leaf play to retreat your decoy to attack first is something you should always consider.
Extra Tip:
- That said, don’t stress too much—this kind of mind game rarely happens during the climb, and most players will misplay their setup before it ever gets that deep.
- The second strategy (letting them KO your tank first, then attacking and using A2-155) can completely lock them out if timed right.
- I've lost games to this exact sequence—so don’t underestimate it.
Card Choices
Pokémon
- A2b-035 – Use its Ability to charge up Energy while A2-110 chips away early. Later, it becomes your heavy hitter or a pseudo-tank you can retreat freely thanks to its self-charging Ability. It’s your go-to attacker when you need to push damage past standard thresholds.
- A2-110 – Your other damage dealer and helps A2b-035 reach damage thresholds. Puts a lot of pressure as well while charging up.
Trainer Cards
- A2b-070 – One of your healing sources, especially useful in early-game stalls. While often seen as the most cuttable card, I run two copies because of how universally useful it is—it applies in most matchups and is very strong in the mirror. A close call vs. running a second A1a-068.
- PROMO-001 – Other form of healing that’s quite flexible because it’s not a Supporter.
- A2b-071 – Mainly for mirror and A2b-035 matchups to make sure you knock out their threats in one hit. You only need one copy since you already have A2-110.
- A1a-068 – Makes it easier to swap threats because of their 2 Retreat Cost.
- A1-225 – Lets you prioritize which targets to knock out first.
- A2-150 – Important for catching threats that retreat.
- A2-155 – Strong comeback card because if one of your Pokémon goes down, it leaves your opponent to just 1 card. That makes it especially powerful in mirror matches.
- A2-147 – Not only boosts your Pokémon’s HP but also breaks away from the usual 140–150 damage thresholds.
- A2-148 – Extra damage source, especially early game when paired with A2-110. It punishes low-HP attackers and can block tempo by making trades more awkward for your opponent.
- PROMO-005 & PROMO-007 – Your mandatory draw engine. These keep the deck consistent and help you find your attackers and Trainers when needed. Always PROMO-007 before PROMO-005 for better odds.
Cards to consider
- A1a-068 (Second Copy) – Running two lets you rotate threats more consistently and keep pressure with double attackers, especially useful in mirror matchups.
- A2-154 – A good consideration since it can force a 2-turn attack with A2-110 getting Energy from A2b-035. Also lets you ping from A2-110 and transfer to A2b-035 on the third turn, making it 4 Energy while dealing 20 damage as well.
- A2-155 (Second Copy) – Adding another isn’t that crazy considering its impact in the mirror while also being one of the biggest counters to A2b-007.
- A2-148 (Second Copy) – Another copy gives you more plays against aggro while also being a discard target for A2-155.
Final Thoughts
A2b-035 & A2-110 is easily the most consistent and powerful deck in the format. It rewards clean sequencing, smart Energy placement, and knowing when to pressure or hold back. Whether you’re climbing to Master Ball or learning high-level trades in the mirror, this deck has all the tools—you just have to pilot it right.
You can also check out our other guides for more insights! With the ranked format here, now is the perfect time to master these strategies, climb the leaderboard, and dominate matchups!